Some product links are affiliate links which means if you buy something we’ll receive a small commission at no cost to you.

I love gel manicures as much as the next girl, but what I don’t love is the cost! I used to get my gel manicure religiously every 2 weeks but ever since I became a mom, that quickly became out of the question with the time and money it required. For the last couple of years, I have missed my manicured fingers so much. I have tried regular polish and nail stickers but none of them lived up to a nice, strong gel manicure. So I thought, why not do my own? In today’s world, you can buy anything online so I thought I’d do some research and check Amazon for the supplies I would need.
If you’re tired of frequent salon visits for your gel manicure or you’re just looking for a more budget-friendly way to maintain your nails without sacrificing quality, read below! With the right tools and techniques, you can achieve salon-worthy nails from the comfort of your own home. Here, we’ll walk you through the steps to give yourself a professional-looking gel manicure for a fraction of the cost.
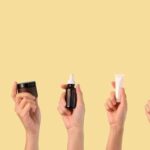
1. Gather Your Supplies

- Gel nail polish color(s) of your choice – I have been using Modelones Gel Nail Polish and LOVE it! The bottles are small but in all reality, you don’t use a lot to paint your nails so it should last for a while. The polish goes on well and is long-lasting. There are many different options as far as colors go and they are very inexpensive! I love this brand and I have no complaints.
- Base coat and top coat specifically designed for gel polish – I am currently using a top and base coat by Gelish that performs well.
- Nail pH bond or nail dehydrator
- UV or LED nail lamp – I currently use one I got years ago by Gelish on super sale that I don’t see on Amazon, so I linked a very popular one instead!
- Nail file, buffer, orangewood stick, and cuticle pusher
- Rubbing alcohol
2. Prep Your Nails
- If you have any old nail polish on, start by removing it. If you have old gel polish on, I LOVE this gel polish remover that works wonders! Just follow the instructions on the box – I buff my polish, leave the remover solution on for 5 minutes, and then it comes right off using the tools provided.
- Shape your nails with a nail file and gently buff the surface to create a smooth canvas and remove any shine.
- Push back your cuticles using a cuticle pusher or orangewood stick. Trim any excess if needed.
- Clean with rubbing alcohol.
- Apply pH bond liquid or nail dehydrator (these will help the gel polish to stick better and last longer).
3. Apply the Base Coat

- Apply a thin layer of the gel base coat to each nail, making sure to cap the edges for long-lasting wear. Applying thin coats of gel polish is the key to making it adhere well and last! Avoid doing thick coats.
- Use an orangewood stick to go around the cuticle edges, making sure no polish is sticking there.
- Cure the base coat under your UV or LED lamp according to the manufacturer’s instructions.
4. Apply the Gel Polish
- Choose your desired gel polish color and apply a thin, even layer to each nail. Avoid getting the polish on your skin or cuticles – again, use an orangewood stick to remove it before curing.
- Cure each coat of polish under the lamp as directed. Most gel polishes require 2-3 coats for full opacity using thin layers.
- If you want to get creative, add some nail art! Here are some tools you can use to create fun nail art with any of the gel colors you have. This specific pack even provides nail rhinestones and foil as well! I am not artistic enough to delve into the world of nail art on my own fingers so I just stick to painting my nails different, complimenting colors, and adding some glitter polish! Even without all the fancy stuff, it still looks beautiful and salon-quality.
5. Add Some Shine with the Top Coat

- Once your color coats are cured, apply a thin layer of gel top coat to seal in the color and add shine.
- Remove the excess with an orangewood stick.
- Cure the top coat under the lamp for the recommended time to ensure a glossy finish.
- Sometimes I will add a second layer of top coat if I feel like they aren’t shiny enough and I will usually cure the top coat twice to ensure everything is set in place.
6. Clean Up and Hydrate
- Use a cotton pad soaked in alcohol to remove the sticky residue left on your nails from the gel polish.
- Finish by applying cuticle oil or hand cream to moisturize and nourish your nails and skin.
7. Enjoy Your Long-Lasting Manicure

- After curing the top coat, and wiping them with alcohol, your gel manicure is complete! Enjoy chip-free nails that can last up to two weeks with proper care.
Tips for Success:
- Always follow the manufacturer’s instructions for your gel products and nail lamp.
- Thin layers are key to a smooth and long-lasting manicure.
- Take your time and don’t rush through the painting and curing process.
- Keep your nails hydrated between manicures to prevent dryness and damage.
- Just like with anything, practice makes perfect so the more you do it, the better your gel manicures will look!
With these steps and tips, you can master the art of giving yourself an at-home gel manicure at a fraction of the cost. Not only will you save time and money, but you’ll also have beautifully polished nails whenever you want them. Gone are the days of spending crazy amounts of time and cash to have nicely manicured nails. By doing things yourself at home, you can make things as easy or as complicated as you would like and it yields beautiful, long-lasting results. What better way to save money and time while having fun creating and experimenting doing it yourself?
Happy manicuring!
Do you have any favorite gel polish brands? Or any helpful tips and tricks? I would love to hear your thoughts!
XOXO,
Katie